阿里云ECS这是个大坑

从来不用国内的服务,但是没有办法,为了速度还是只能在国内找,矮子里挑个高的,只能选择阿里云。。。但是随之而来的是各种大坑。。

ECS 封掉了25端口,也就是说你不能在上面创建任何邮件服务器。。。阿里云工单的回答是,只能使用阿里云云邮箱或者第三方,需要修改代码。。。

修改你妹妹啊。。我是直接用bash 调用postfix做发件服务,没有代码。。。

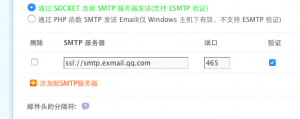
找了一晚上加一上午,目前最好的办法就是使用qq 的免费企业邮箱。。但是qq 比较鬼的是。。他在文档中没有标明有587端口。。但是你确可以使用这个端口。。。465 是ssl 端口,这样配置起来会比较麻烦。。

首先是创建qq的免费企业邮箱,得到smtp 信息

smtp:  smtp.exmail.qq.com:587

TLS

然后在centos 里面安装postfix 和 sasl 模块

sudo yum install postfix cyrus-sasl cyrus-sasl-lib cyrus-sasl-plain -y

编辑 /etc/postfix/main.cf, 然后加上

relayhost = [smtp.exmail.qq.com]:587

smtp_sasl_auth_enable = yes
smtp_sasl_security_options = noanonymous
smtp_sasl_password_maps = hash:/etc/postfix/sasl_passwd
smtp_use_tls = yes
smtp_tls_CAfile = /etc/ssl/certs/ca-bundle.crt
smtp_sender_dependent_authentication = yes
smtp_generic_maps = hash:/etc/postfix/generic

在/etc/postfix/sasl_passwd 里面写用户名和密码, 比如说用户名为 [email protected], 密码为iamhippo, 那么就这么写:

[smtp.exmail.qq.com]:587 [email protected]:iamhippo

在/etc/postfix/generic 要重写mail from 的地址,假如你的hostname 是i.iamhippo.com, 那么就可以写成:

@i.iamhippo.com [email protected]


最后就是生成hash 数据库了:

postmap /etc/postfix/sasl_passwd
postmap /etc/postfix/generic
chmod 600 /etc/postfix/sasl_passwd*

然后我们只需要重启postfix,就大功告成

service postfix restart

nginx 隐藏版本version

现在我旗下的网站基本全部都转移到nginx了,但是nginx 出现40X 和 50x 的错误的时候,经常会显示版本号,这让我很不爽

无意间看到某个nginx站点出问题的时候,竟然不显示版本号。 google 了一下,原来nginx 有个命令叫做server_tokens, 把它设置为off 即可


Syntax: server_tokens on | off | build | string;
Default: 
server_tokens on;
Context: http, server, location

CentOS 6 安装SmokePing教程

smokeping是对IDC网络质量,稳定性等最好的检测工具,包括常规的 ping,dig,echoping,curl等,可以 监视 www 服务器性能,监视 dns 查询性能,监视 ssh 性能等。Smokeping是rrdtool的作者Tobi Oetiker的作品,所以底层也是 rrdtool 做支持。smokeping是一个很老的开源项目了,不过考虑到现网以下两方面的需求,感觉还是有必要部署的。1、针对虚拟化平台主机重启速度较快,普通的监控平台可能敏感度不够;2、业务和网络部门经常有对网络质量和页面访问速度对比的需求。

smokeping安装前,可以参考官方安装页面:

http://oss.oetiker.ch/smokeping/doc/smokeping_install.en.html

具体要求如下:

RRDtool 1.2.x or later
FPing (optional)
EchoPing (Optional)
Curl (Optional)
dig (Optional)
SSH (Optional)
Webserver
Perl 5.8.8 or later(对应的模块如下)
 FCGI
 CGI, CGI::Fast
 Config::Grammar
 LWP
 Socket6 (optional)
 Net::Telnet (optional)
 Net::OpenSSH (optional)
 Net::DNS (optional)
 Net::LDAP (optional)
 IO::Socket::SSL (optional)
 Authen::Radius (optional)

更多

/etc/fstab 详细说明

/etc/fstab 是专门用配置挂载硬盘的文件

语法为:

[Device] [Mount Point] [File System Type] [Options] [Dump] [Pass]

详细解释为:

<device>

The device/partition (by /dev location or UUID) that contain a file system.

<mount point>

The directory on your root file system (aka mount point) from which it will be possible to access the content of the device/partition (note: swap has no mount point). Mount points should not have spaces in the names.

<file system type>

Type of file system 

<options>

Mount options of access to the device/partition (see the man page for mount).

<dump>

Enable or disable backing up of the device/partition (the command dump). This field is usually set to 0, which disables it.

<pass num>

Controls the order in which fsck checks the device/partition for errors at boot time. The root device should be 1. Other partitions should be 2, or 0 to disable checking.

第一列和第二列的device 和 mount point 顾名思义,就是你想要挂载的device  和挂载的位置.

device 有两种表示方式,可以用/dev/xdx 之类的location 或者 硬件的UUID 来表示,硬件的UUID 可以用blkid 来查询

第三列的file system type 也很好理解,这里一般有auto, vfat( for FAT partition), ntfs or ntfs-3g( for NTFS partition), ext4 or ext3 or ext2 or jfs,  udf or iso9660 ( for CD/DVD), swap

第四列的option,一般用默认的defaults,但是也可以使用下面的option:

sync/async - All I/O to the file system should be done (a)synchronously.
auto - The filesystem can be mounted automatically (at bootup, or when mount is passed the -a option). This is really unnecessary as this is the default action of mount -a anyway.
noauto - The filesystem will NOT be automatically mounted at startup, or when mount passed -a. You must explicitly mount the filesystem.
dev/nodev - Interpret/Do not interpret character or block special devices on the file system.
exec / noexec - Permit/Prevent the execution of binaries from the filesystem.
suid/nosuid - Permit/Block the operation of suid, and sgid bits.
ro - Mount read-only.
rw - Mount read-write.
user - Permit any user to mount the filesystem. This automatically implies noexec, nosuid,nodev unless overridden.
nouser - Only permit root to mount the filesystem. This is also a default setting.
defaults - Use default settings. Equivalent to rw, suid, dev, exec, auto, nouser, async.
_netdev - this is a network device, mount it after bringing up the network. Only valid with fstype nfs.

第五列 dump,dump 是linux 系统中的一个备份工具,用0 来表示不备份这个区,1 表示备份。这里不适合长篇大论来讨论dump 和 fsck ,但是通过查看/etc/fstab 的例子可以看到,第五列的选项一般为0

第六列 fsck 表示fsck 是否会check这个区,一般用1 来表示根分区, 2 表示其他的分区;0表示不检查

对于第5,6列来说,

/ 一般为1 1

swap 一般为 0 0

其他分区一般为1 2

云硬盘可谓0 2


阿里云centos创建swap分区的办法

以前不用国内的云,现在一用。。真是不用不知道。。用了你就留掉坑里了。。系统盘只能升不能降。。

阿里云全系linux系统不配置swap分区,按照阿里云的说法是为了让大家多买内存。。。以减少对swap的依赖。。however,许多应用程序要求必须要有swap分区,比如说大名鼎鼎的oracle

话不多说,下面说下centos创建swap的方法. 目前主流的做法有两种: 一是创建一个单独的分区,专门用来做swap区,这是推荐的做法。但是对于阿里云来说,如果你没有加载第二个或者第三个数据盘,这是很难实现的。因为对系统盘做无损分区,这基本是不可能的事情。因此,只有当你挂载了第二个数据盘或者多个数据盘,还没有开始使用的情况下,可以使用这个方式;二是专门创建一个目录来做swap分区,这种方法不受系统盘和数据盘的限制,哪里有空间,哪里就可以设置。但是这种方式的速度不如直接挂载一个分区过去速度快。

第二种方式,阿里云的官方文档中有详细的说明: https://help.aliyun.com/knowledge_detail/42534.html

这里我就不多说了。这篇文章主要关注点在于创建一个分区然后挂载到swap分区上

swap 的大小,根据我多年的经验,在内存小于等于4G时,可以设置为内存的2倍;在大于4G时,建议设置为和内存大小一样。

对新数据盘进行分区,就是使用fdisk /dev/vdx 命令,然后跟着命令走就可以了

格式化的时候,和格式化普通格式硬盘不一样,需要使用mkswap命令, 加入我们创建的分区为/dev/vdb1

则命令为

mkswap /dev/vdb1

swapon /dev/vdb1

第一句话表明格式化为swap 分区,第二句话表示enable swap分区。

运行完这两个命令,用free -m就可以看到swap分区了。

如果在 /etc/rc.local 中有 swapoff -a 需要修改为 swapon -a

但是当你重启以后,你会发现swap又没有了。。这是因为我们需要把挂载swap的命令写入/etc/fstab里面

/dev/vbd1 swap swap defaults 0 0

但是这还没完呢

在 Linux 系统中,可以通过查看 /proc/sys/vm/swappiness 内容的值来确定系统对 SWAP 分区的使用原则。当 swappiness 内容的值为 0 时,表示最大限度地使用物理内存,物理内存使用完毕后,才会使用 SWAP 分区。当 swappiness 内容的值为 100 时,表示积极地使用 SWAP 分区,并且把内存中的数据及时地置换到 SWAP 分区。

标准的linux安装板,会把此值这是为60

可用下面的命令临时修改此项参数:

echo 10 >/proc/sys/vm/swappiness

若要永久修改此项配置,需要编辑/etc/sysctl.conf, 并增加一下内容:

# vim /etc/sysctl.conf
vm.swappiness=10
# sysctl -p

CentOS 开启NFS服务以及在Centos上挂在NFS

NFS 服务器这里我称之为Master服务器,IP为192.168.1.2,需要挂载NFS服务器的我称之为client,client服务器的IP为192.168.1.13

A服务器安装CentOS 6.X 64bit,首先需要安装NFS服务并且开启这个服务

yum install nfs-utils nfs-utils-lib

chkconfig nfs on 
service rpcbind start
service nfs start

其次,我们需要在Master服务器上决定我们要共享哪个文件夹,然后把文件夹目录以及符合共享,写入/etc/exports

假如说我们想共享/home目录

那么我们首先需要编辑/etc/exports

vi /etc/exports

加入以下命令:

/home 192.168.1.13(rw,sync,no_root_squash,no_subtree_check)

rw:表示client主机可以对共享的文件夹进行读和写的操作

sync: Sync confirms requests to the shared directory only once the changes have been committed.

编辑完/etc/exports以后,我们需要运行以下command来让配置生效:

exportfs -a

这样我们就完成master服务器的配置

下面我们来配置client服务器,安装nfs服务

yum install nfs-utils nfs-utils-lib

假如说我们需要把NFS挂载到/home/nfs

mkdir -p /home/nfs

mount 192.168.1.2:/home /home/nfs

这样我们就完成了挂载,可以通过df -h或者mount 来查看系统的挂载情况

但是这种挂载只是临时性的,每次我们重启,就需要重新运行一次挂载命令。为了省事,我们可以将挂载写入/etc/fstab

192.168.1.2:/home /home/nfs nfs auto,noatime,nolock,bg,nfsvers=3,intr,tcp,actimeo=1800 0 0

监测服务器的流量使用情况

一般来说,服务器的提供商一般都是会在后台提供这种检测的.

但是,总会有少数没有的情况, 尤其是在检测一些流量使用比较大的服务器上

解决方案:

1 vnstat, 小巧简单

   一篇文章关于在debian上的使用: https://debian-administration.org/article/330/Monitoring_your_bandwidth_usage_with_vnstat

2 wireshark, 这个是鼎鼎有名的

3 iptraf

4 cacti