原来的网址https://ports.vmware.com关掉了,移到了下面的这个位置:
https://ports.broadcom.com/home/vSphere
原来的网址https://ports.vmware.com关掉了,移到了下面的这个位置:
https://ports.broadcom.com/home/vSphere
VMware其实建议了vCSA security的best practice:
the access to the vCSA should only be allowed from trusted hosts or virtual machines, and access to the remaining devices should be blocked. Also note that some 3rd party VMware backup products or vROPs, SRM etc. should be considered when blocking access to the vCSA.
vCSA默认是不log iptables的activity,如果你想看到iptables的log,你可以在vCSA的shell上运行下面的commands:
# iptables -N LOGGER
# iptables -A LOGGER -j LOG –log-prefix ‘iptable log: ’ ‘ --log-level 7
# iptables -A OUTPUT -j LOGGER
# iptables -I OUTPUT -j LOGGER
# iptables -I INPUT -j LOGGER
然后你就可以通过下面的command来监控iptables 的log:
# journalctl -k |grep “iptable”
加固vCSA有多种措施,最简单有效的就是网络层的限制,也就是通过防火墙来限制.
vCSA自带一个简单的防火墙,调用的是iptables,可以通过vCSA IP:5480 来访问vCenter Server Appliance。
在firewall 里面只能简单的whitelist 或者blacklist ip or CIDR.
一个简单的策略就是在firewall 里面 白名单自己的堡垒机IP,管理IP,备份IP等等,然后通过SSH,登录root,在iptables 里面
直接ban掉80,443和5480端口,这样就相当于你的管理端口没有暴露在公网上.
下面是详细的iptables 规则:
iptables -N inbound-custom
iptables -A inbound-custom -p tcp -m tcp --dport 80 -j DROP
iptables -A inbound-custom -p tcp -m tcp --dport 443 -j DROP
iptables -A inbound-custom -p tcp -m tcp --dport 5480 -j DROP
iptables -A inbound-custom -j RETURN
iptables -I INPUT 5 -j inbound-custom
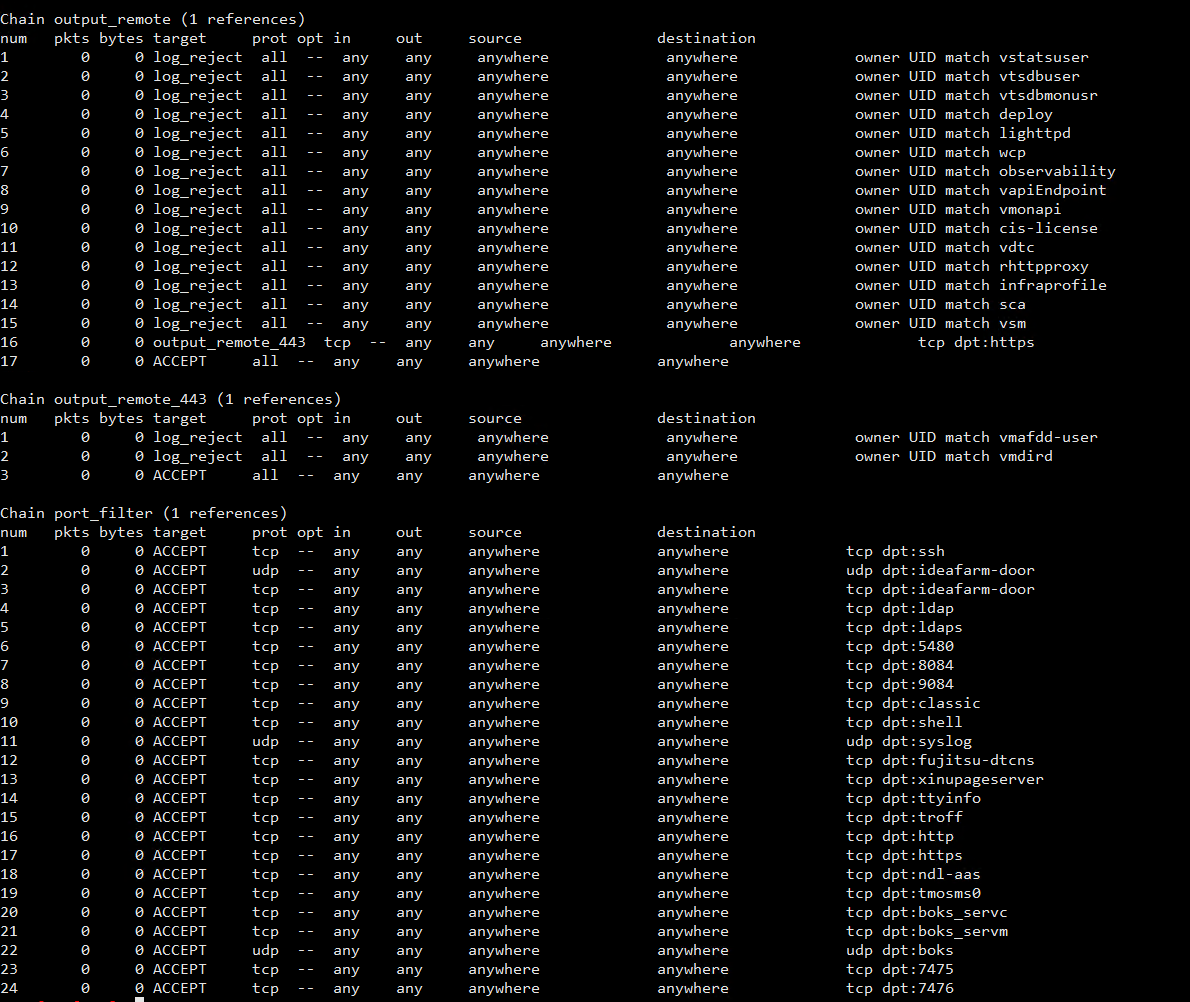
下面是全新安装的vCSA的默认iptables规则,这里做一个记录方便后面来secure vCSA:
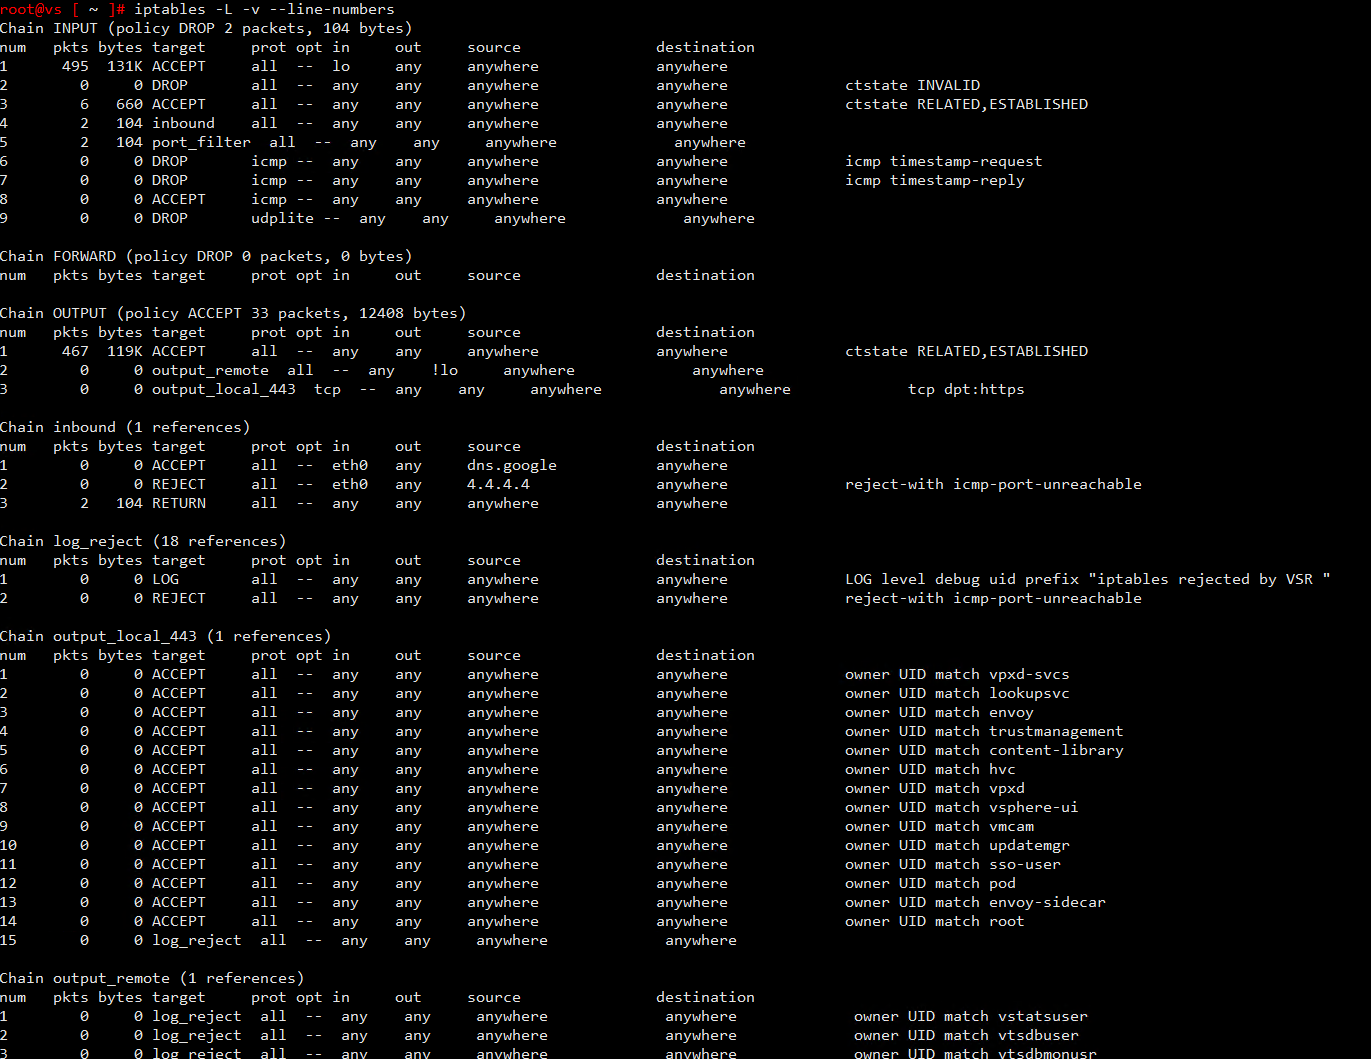
debug iptables规则的时候,不要仅仅简单的使用
iptables -L INPUT
虽然自己不喜欢在iptables 的INPUT chain 里面绑定interface,但是还是有很多公司喜欢的
(今天的debug 没有注意到interface,结果白白浪费了一上午时间)
因此一般建议使用
iptables -L INPUT -v --line-numbers
或者更加推荐使用
iptables -nvL INPUT --line-number
-n → Numeric output (prevents DNS resolution, showing raw IPs instead of hostnames).
-v → Verbose output (displays packet counts, byte counts, and interface details).
-L → List rules in the specified chain (INPUT in this case).
升级vSphere 8之前,需要做如下检查:
总体来说,大版本的升级主要有三种方式
1 使用ISO
2 使用vSphere Lifycycle Manager
3 使用ESXCLI命令
使用ISO升级:
下载ESXi 8.0 的镜像,然后让ESXi 7 Host 进入maintenance 模式,设置Host 从ESXi 8.0 的ISO 启动,就可以升级了
使用vSphere LifeCycle Manager升级:
最简单明了的方式,推荐使用。
使用ESXCLI命令:
从vSphere 8起,传统的vSphere Lifecycle Manager baselines(VUM)已经被抛弃了,VMWare 推荐使用vLCM来进行更新。
(综合体验下来,确实vLCM更加的好用)
在这篇文章中,我们将使用vLCM来将ESXi 7 升级到ESXi8.
初始配置如下:
vCenter Server的版本是8 U3
ESXi host 的版本是7
1 如果要使用desired image的办法,我们在vCenter inventory中,找到我们想要升级的ESXi 7 host,然后点击Update-> Image
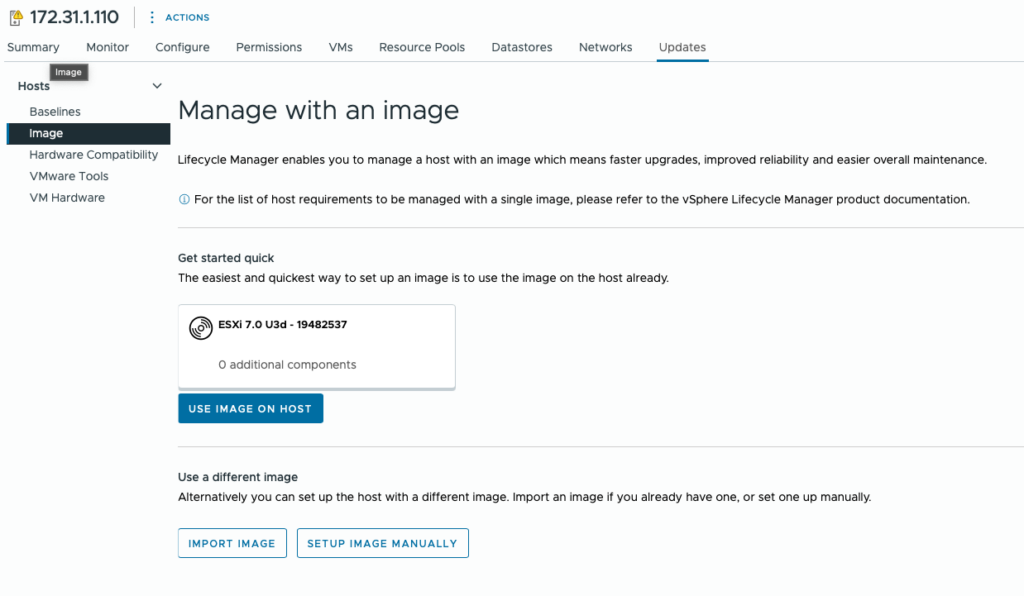
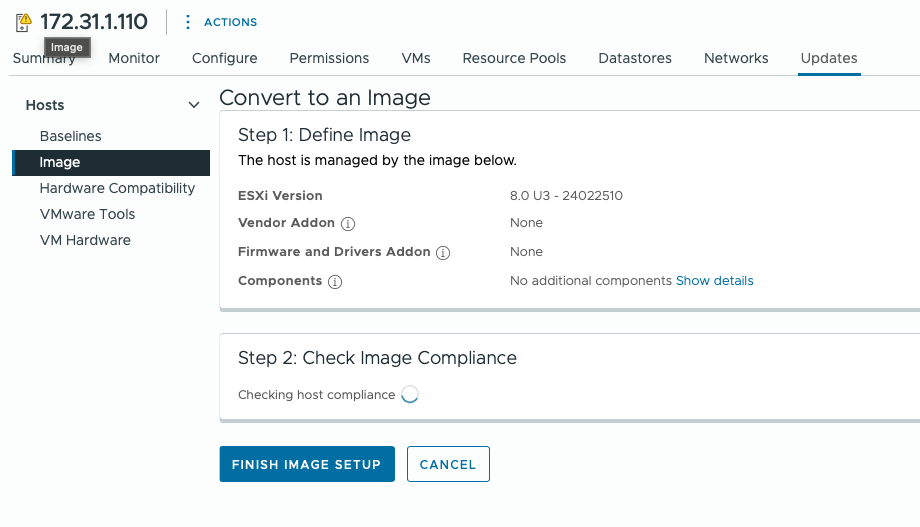
2 Step1,我们点击Setup Image Manually, 然后选择我们想要的image。在这里我们选择ESXi version 8.0 U3, 不需要添加其他的components
先validate一下,然后save
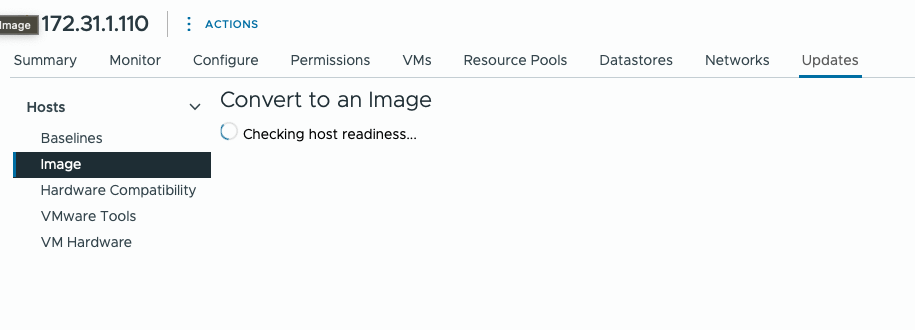
3 Step 2 是检查这个image 的compliance
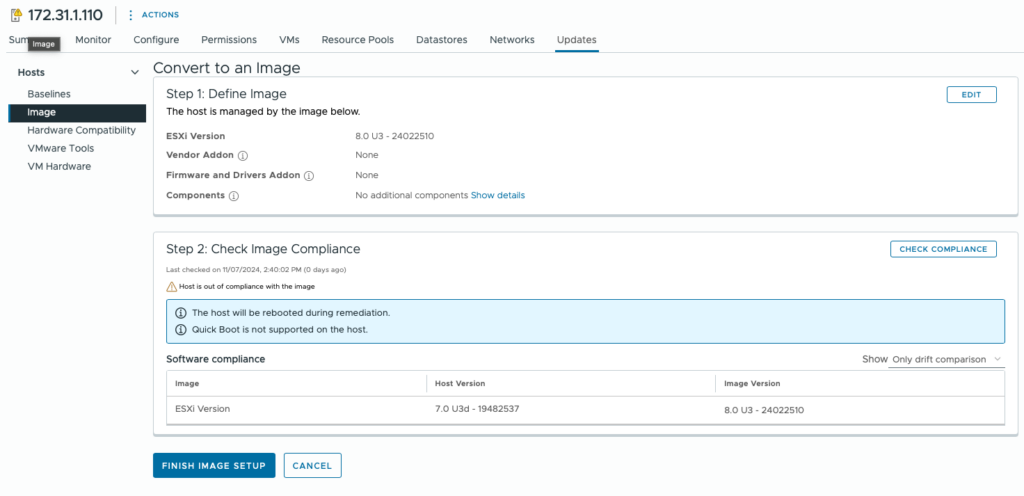
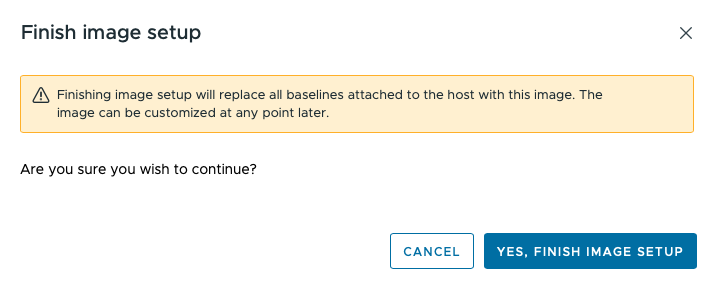
4 显示这个host “Out of compliance with image”, 然后我们点击 FINISH IMAGE SETUP。
5 下面我们就可以开始用这个image来更新ESXi 7了
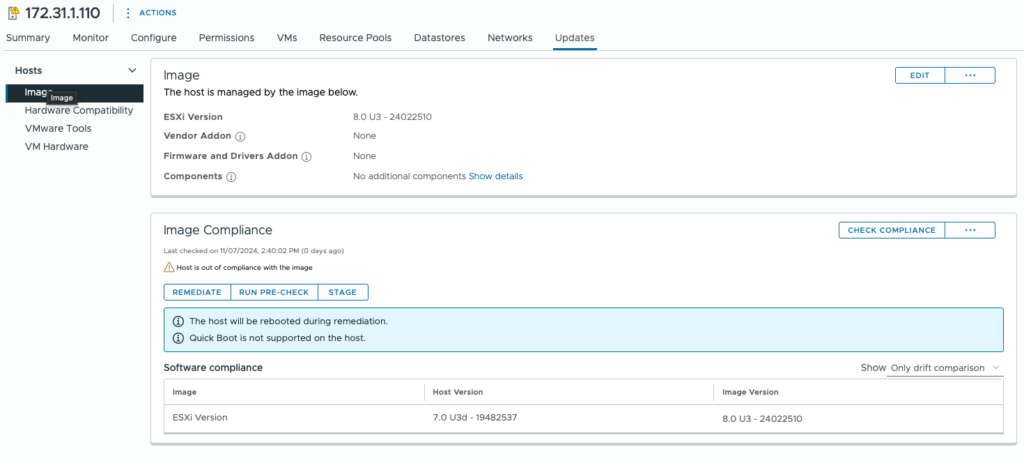
6 我们首先需要 RUN PRE-CHECK一下,确定都没有问题了就可以点击REMEDIATE来进行真正的upgrade
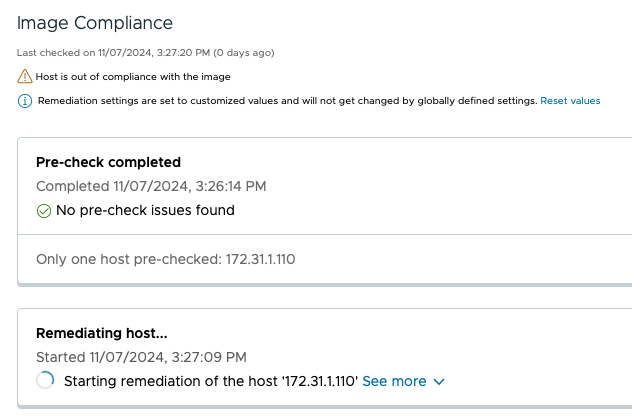
Host 然后就会开始being remediated 和 rebooted。在Recent Tasks面板这里能够看到Remediate Host 这个Task。同时
我们也能在Image Compliance这里看到remediation 的进程。
Host在更新完毕重启后,我们就能在vCenter里面重新看到这个Host,并且ESXi的版本也升级到了8.
因为vSphere 已经逐渐在抛弃老的CPU了,所以这里对intel的每代Xeon CPU的代码做一个记录:
2nd: Sandy Bridge
3rd: Ivy Bridge
4th: Hashwell
5th: Broadwell
6th: Skylake
7th: Kaby Lake
8th: Coffee Lake
9th: Coffee Lake Refresh
即便是同一个文件夹的压缩文件,如果压缩的时间不一样,那么产生的压缩文件的md5值也是不一样的。
原因有三个:
1 Timestamps in Metadata – Many compression tools store file timestamps (creation, modification, and access times) inside the archive. If you compress the same folder at different times, these timestamps may differ, leading to a different MD5 hash.
2 Compression Algorithm Variations – Some compression tools use different compression settings, even if the same files are inside. Small variations in compression level or metadata can result in a different output file and a different MD5 hash.
3 Order of Files – If the compression tool does not always process files in the same order, the resulting archive may be structured differently, leading to a different MD5 hash.
如果想得到固定的MD5值,可以使用如下的三个方法:
1 Hash Individual Files – Instead of hashing the compressed folder, compute MD5 hashes for each file inside the folder and compare them.
2 Use Deterministic Compression – Some tools (like tar –sort=name with gzip –no-name) help create archives with consistent metadata.
3 Exclude Timestamps – Some formats allow you to omit timestamps (e.g., zip –latest-time).