ESXi 跨越大版本(比如说6.5到6.7,6.7到7)的升级,总的来说有两种方式. 一种是通过vCSA 的Life Cycle Manager 来import ISO,设定好baseline 来升级. 另外一种就是通过cli 的方式来直接升级. (通过ISO文件启动来升级的方式比较少见)
什么情况下用的到cli的方式来升级呢? 比如说vCSA 所在的ESXi 的host 需要升级,或者说你没有使用vCSA,而只是使用single ESXi host 等等
下面就详细说以下Cli 的升级方式.
Cli 升级也分为两种方式, 一种是offline 升级,一种是online升级. 不管是offline还是online, 首先都需要关闭ESXi host上的所有VM,方便进入maintenance 模式
命令参数: -p 代表 profile, -d 代表depot
Offline 升级:
- 从my.vmware.com上下载offline 升级的bundle, 如下图,选择Vmware vSphere Hypervisor(ESXi) Offline Bundle. 下载完了一定要注意验证md5
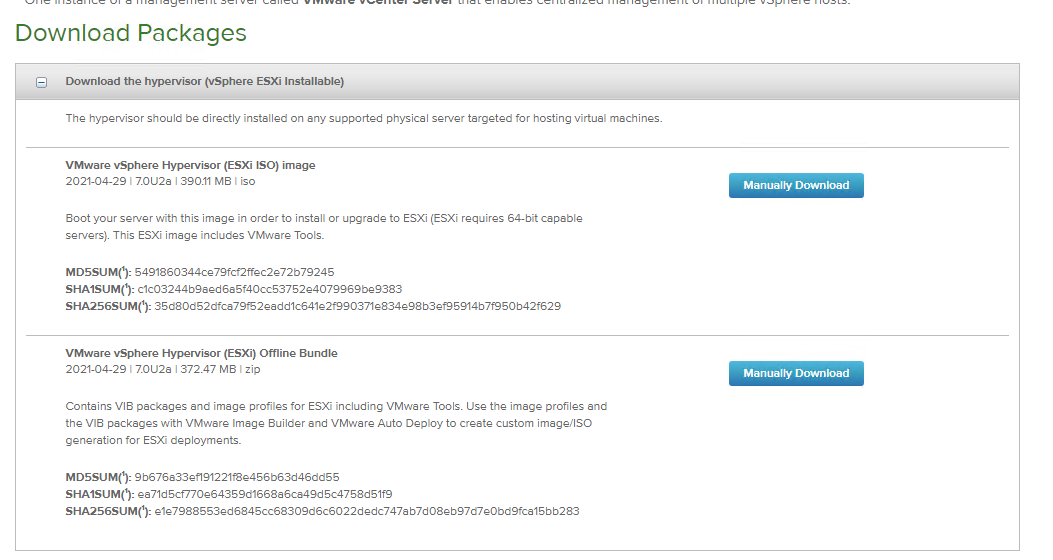
2.ESXi host上面打开SSH, 把bundle 文件上传到datastore
3.检查这个offline bundle中的可用的profile, 一般选择standard 结尾的那个profile, no-tools结尾的一般用于pxe
esxcli software sources profile list -d /vmfs/volumes/datastore1/ISOs/VMware-ESXi-7.0U2a-17867351-depot
这里我们选择 ESXi-7.0U2a-17867351-standard
4. Dry-run upgrade, 看看那些VIBs会被移除和新增
esxcli software profile update -p ESXi-7.0U2a-17867351-standard -d /vmfs/volumes/datastore1/ISOs/VMware-ESXi-7.0U2a-17867351-depot --dry-run
5.设置ESXi host进入maintenance mode
esxcli system maintenanceMode set –enable true
6. 升级
esxcli software profile update -p ESXi-7.0U2a-17867351-standard -d /vmfs/volumes/datastore1/ISOs/VMware-ESXi-7.0U2a-17867351-depot
7. 设置ESXi 退出maintenance mode
esxcli system maintenanceMode set --enable false
8. 重启
reboot
Online升级:
- ESXi host 进入maintenance 模式
esxcli system maintenanceMode set --enable true
2. 防火墙里打开http traffic
esxcli network firewall ruleset set -e true -r httpClient
3. 在VM repo上检查ESXi 7.0 可用的profiles
esxcli software sources profile list -d https://hostupdate.vmware.com/software/VUM/PRODUCTION/main/vmw-depot-index.xml | grep ESXi-7.0
查询需要一定的时间, 然后如上面的offline 升级一样,会列出可用的profile,我们这里选择最新的以standard结尾的profile
ESXi-7.0U2d-18538813-standard
4. dry-run检查
esxcli software profile update -d https://hostupdate.vmware.com/software/VUM/PRODUCTION/main/vmw-depot-index.xml -p ESXi-7.0U2d-18538813-standard --dry-run
5. 正式升级
esxcli software profile update -d https://hostupdate.vmware.com/software/VUM/PRODUCTION/main/vmw-depot-index.xml -p ESXi-7.0U2d-18538813-standard
需要一定的时间来完成,这个时候安心等待就可以
从6.X升级到7的时候,有的时候会出现下面的错误提示:
Got no data from process: LANG=en_US.UTF-8 /usr/lib/vmware/esxcli-software profile.update -d "https://hostupdate.vmware.com/software/VUM/PRODUCTION/main/vmw-depot-index.xml" -p "ESXi-7.0U2d-18538813-standard"
这是因为你的ESXi Host上没有一个static scratch分区. 要不然就按照下面的方法来设置static scratch分区:
要不然就直接先用offline升级的方式升级到7.0,然后在用Cli 或者其他的方法升级到最新的7.X ESXi版本. 这是因为在ESXi 7 中,使用scratch 的方式发生了变化. 我建议使用offline 的方式,因为offline 的方式升级速度非常的快!
6. 恢复原来的防火墙设置
esxcli network firewall ruleset set -e false -r httpClient
7. ESXi host退出maintenance模式
esxcli system maintenanceMode set --enable false
8. 重启
reboot